
Make a classroom label that stays readable
Build a subject label with the Learning label starter, adjust its layers, and check the result at its actual size.
Find the right file, make your changes, and save your work.
Follow the real screens below. Each numbered pointer shows the control to use and explains what happens next.
Choose a screen guide
The numbers on each screen match the instructions beside it. Select a number to highlight the control it explains.
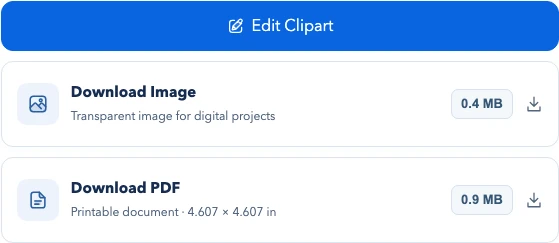
Choose Image or PDF to open a full-screen download window over the current page. Check the file details, then save your original file.
The studio keeps text, shapes and image layers separate. These examples show where to select a layer, change wording and save your work.
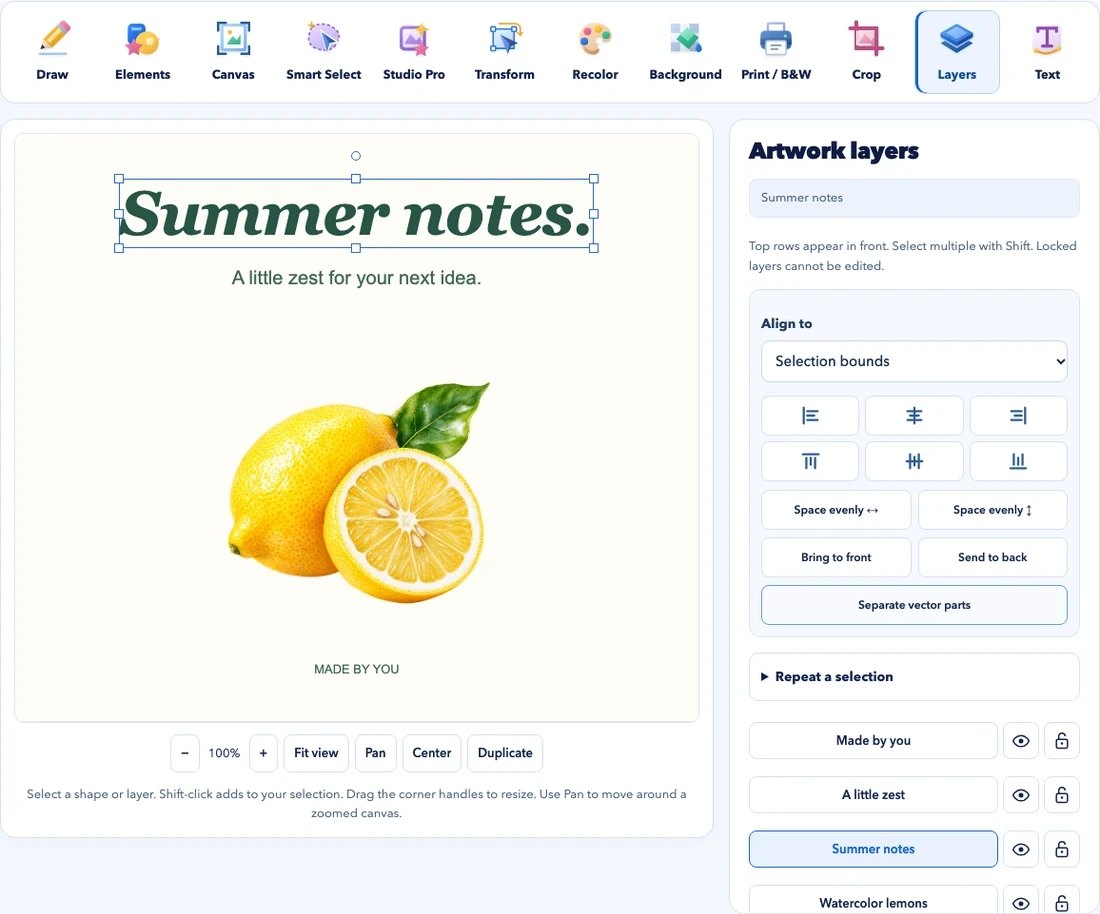
Use Text in the toolbar, enter a caption and choose Add / update caption. Keep enough space around your words and check the wording before exporting.
Open Layers and select the item you want to work with. Named rows help when a small object is hard to select on the canvas. An imported illustration may be one image layer, not many separate vector objects.
The selection frame shows the current object. Use the editor’s transform and alignment controls to change its position or size. Preserve proportions when resizing an illustration.
Save project downloads the editable project. Keep that copy if you want to change the wording or layout next time. Reopen it with Open saved project.
Export opens the file choices for your edited artwork. Choose an image or PDF there. A finished image does not restore the separate editable objects in your project.
Use Print setup for a studio PDF. If you are placing a downloaded image in another app, use the print size calculator with that image’s actual pixel dimensions.
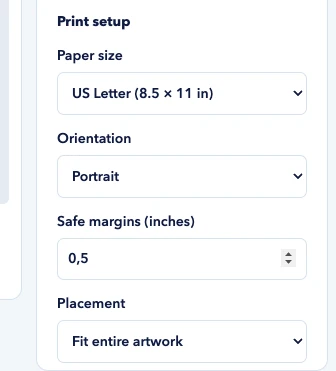
Set the paper size first, then Portrait or Landscape. The size of the PDF page follows this selection; do not assume every catalog PDF uses the same paper size.
Safe margins reduce the area available for the illustration. Check your printer’s requirements. Zero margin in a layout does not make a printer support borderless output.
Fit keeps the whole composition within the available area. Check the paper preview for clipping. Placement that fills the page may crop part of the artwork.
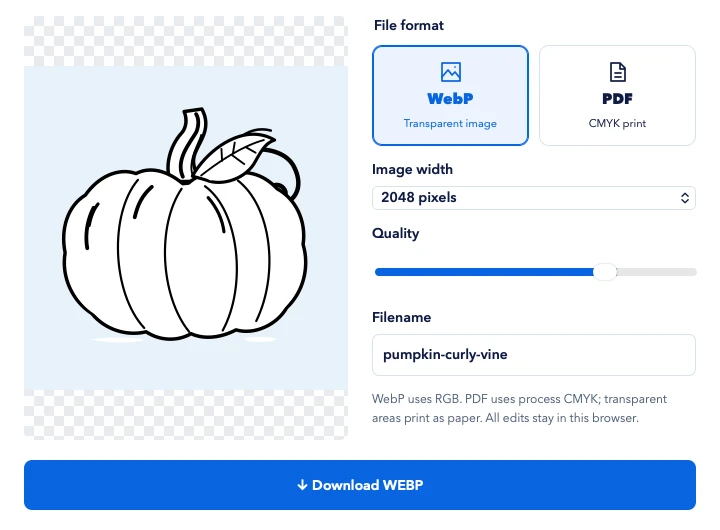
Choose PDF in File format. Check the page preview and the filename. Image export settings and PDF export settings are different.
After PDF is selected, use Download PDF in the position shown here. Open the saved document. To preserve its planned physical size, choose Actual size or 100% in the print dialog and check one copy first.
Save an illustration with its heart button, then use Favorites to group images for a project. The screenshots show sample boards and saved artwork.
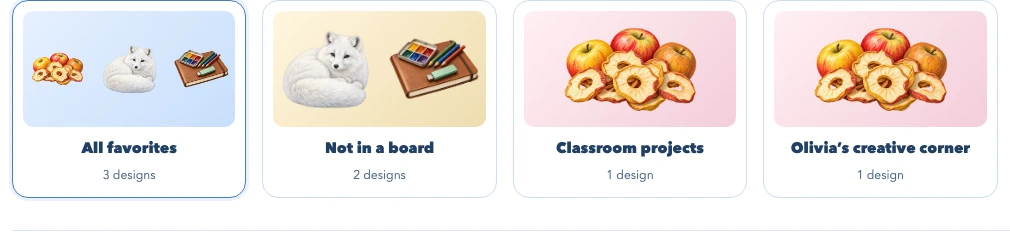
Choose a board to see its saved illustrations. All favorites shows everything. To start a new collection, use Create board in Favorites and give it a name you will recognize.
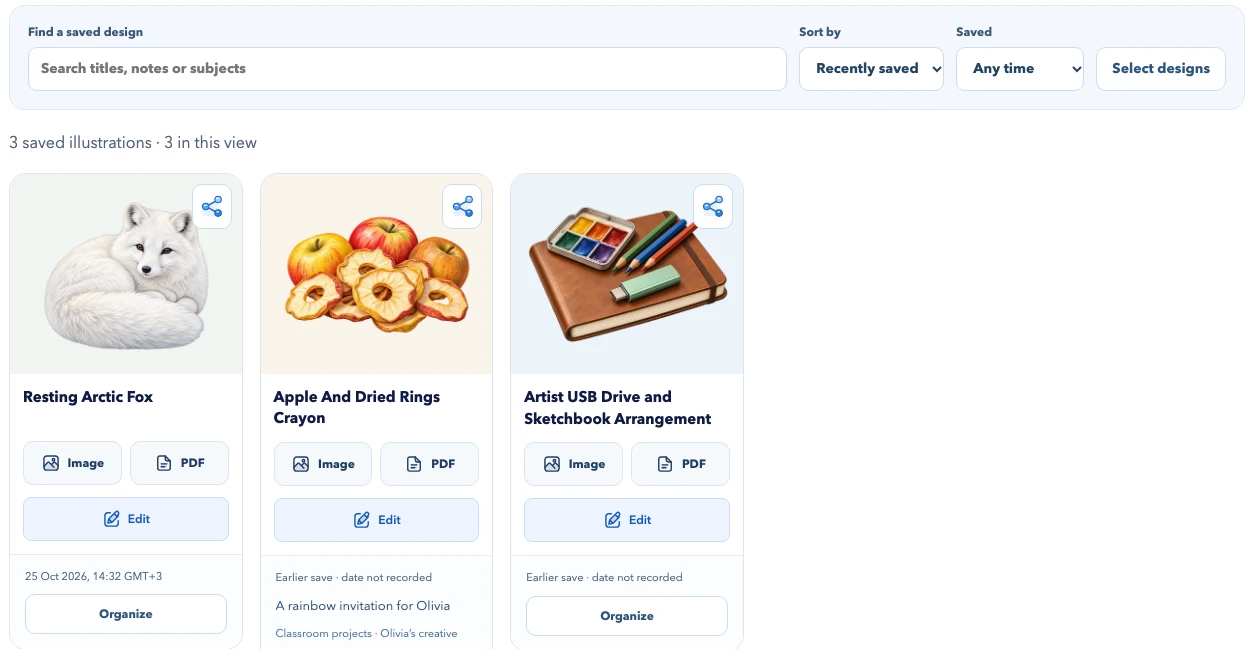
Find a saved design using its title, subject or your note. Use Sort by and Saved to narrow the list further.
Use Select designs, choose the illustrations, then pick a destination board and Add to board. You can group the same saved illustration into more than one board.
Use Organize on a saved card to set its boards or add a note. Saved dates appear on cards when recorded. Use Export backup below the collection to keep your boards, notes and dates in a separate file.
These are real interface examples. Artwork, file sizes and control positions can vary. Use the links to open the working tools; screenshots show how to use them.
For a longer walkthrough, start with one of these examples.
Build a subject label with the Learning label starter, adjust its layers, and check the result at its actual size.
Turn the Botanical sprig starter into clear outlines, simplify its layers, and leave room for a personal caption.
Choose transparent WebP, a printable CMYK PDF, or an editable project with a clear understanding of what each one preserves.

Find free artwork for worksheets, teaching slides, classroom labels and visual instructions, with practical steps for adapting and reusing your materials.
Use a finished file outside the studio. Keep a project file when you want to edit again.
 Image WebP format
 PDF Printable document
 Project Editable studio file
Choose Image for a picture to place in another app. The image download is WebP. Choose PDF for the separate printable document. To keep an editable studio design, use Save project as well.
File format guideSome apps display a white page behind a transparent image. Check the Transparent background label, then place the file over a colored shape in your design app. Changing the background on an artwork preview does not change the downloaded file.
About image backgroundsAn image layer contains the finished drawing as pixels. Its leaves, petals or painted details are not separate vector layers. Use a layered studio starter when you need to edit individual shapes.
Browse editable startersFit to page can change the scale, and transparent borders count toward an image’s dimensions. Check the intended size in the calculator, use Actual size or 100% in your print dialog, and check your printer’s margins.
Check print dimensionsDownload the editable file using Save project, transfer it to the other device and choose Open saved project in the studio. Browser recovery and Favorites stay in the current browser unless you export a separate copy.
Open the studioJotClipart artwork is for personal and educational use. Commercial use and resale are not permitted. Recoloring, editing or changing the file format does not change that license.
Read the artwork license